FLUENT利用camera parameter将视图精确旋转
2016-09-30 by:CAE仿真在线 来源:互联网
不知道你有没有和我一样被Camera Parameters窗口下的那个调整视图的小箭头(图一)给弄得抓狂过。不管怎么拖动,都很难把视图精确旋转90度。
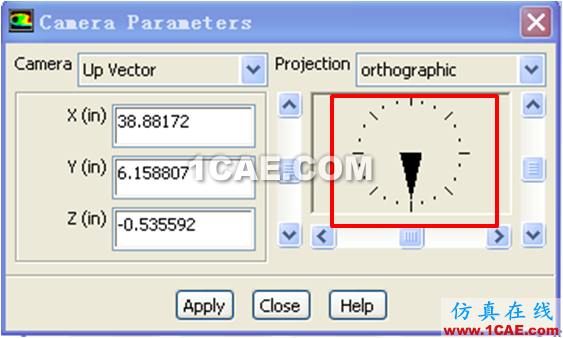
图一 Camera Parameters窗口
用小箭头调出来的视图往往不是整90度,总会有点儿偏斜(图二)。
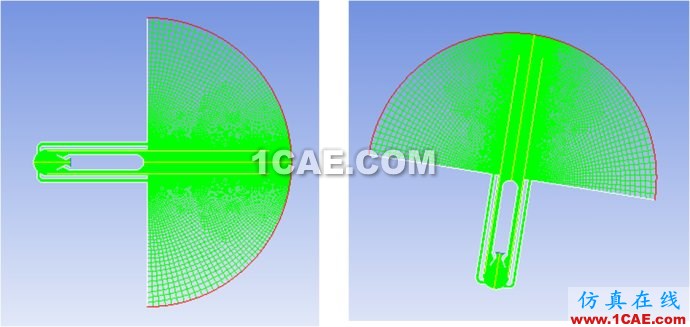
图二 原图 用小箭头调整的视图
其实有更容易的方法来将视图精确旋转90度。如图三所示,在左侧的camera下拉菜单选择up vector, 将x,y,z设置为(1,0,0),然后点击下面的Apply按钮。视图就会变成图四那样的完美90度旋转。
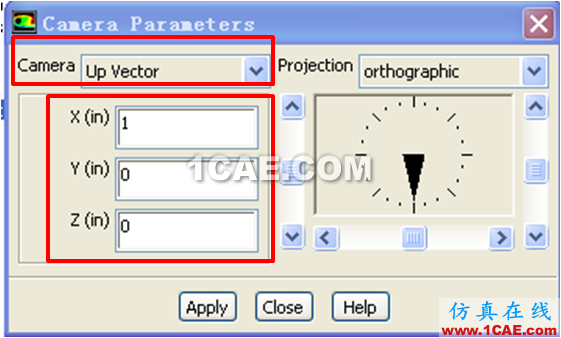
图三 精确逆时针旋转90度的设置方法
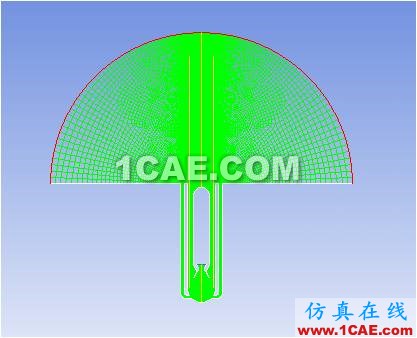
图四 精确逆时针旋转90度后的视图
其实FLUENT帮助文件里对camera下拉菜单里的四个选项(position, target, up vector, field)做了形象的说明,如图五所示,四个选项分别表示:
【help文件原文】“Position” is the camera’s location. “Target” is the location of the point the camera is looking at, and “up vector” indicates to the camera which way is up. “Field” indicates the field of view (width and height) of the display.
翻译过来就是:
postion:camera放置位置
target: 镜头看向的位置
up vector: 从镜头看过去的朝上的方向
Field:画面视野范围(宽和高)
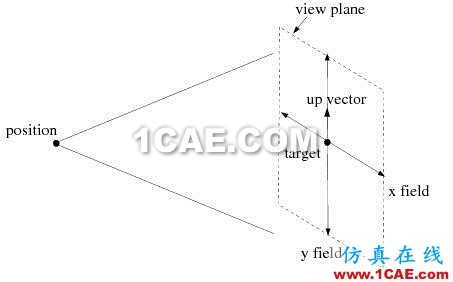
图五 position, target, up vector,
field
所以,当up
vector设置成(1,0,0)时,就是把原图的x轴正向设成了camera的朝上方向,就是将原图逆时针旋转90度的效果。同理,如果想把原图顺时针旋转90度,就可以将up
vector设成(-1,0,0)。
相关标签搜索:FLUENT利用camera parameter将视图精确旋转 Fluent培训 Fluent流体培训 Fluent软件培训 fluent技术教程 fluent在线视频教程 fluent资料下载 fluent分析理论 fluent化学反应 fluent软件下载 UDF编程代做 Fluent、CFX流体分析 HFSS电磁分析


