
Hypermesh基础入门<1>
2017-02-23 by:CAE仿真在线 来源:互联网
测量
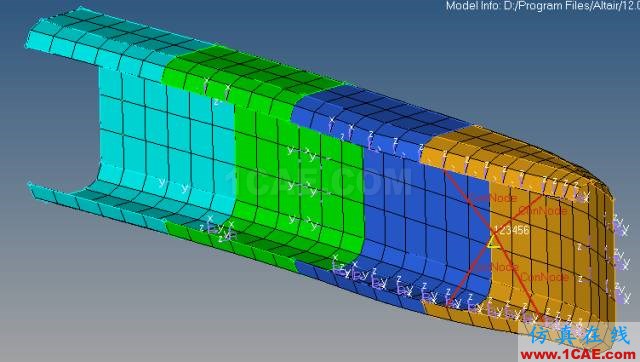
Hypermesh在建模时打开文件有Geometry,Model,Solver deck等类型,其中的Geometry即是需要建模的几何图形,Solver deck就是建好的模型,Model是几何图形+网格的混合体。
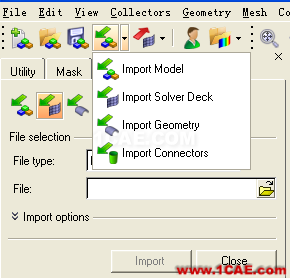
今天打开的是一个model,既有几何又有网格,安装了Hyperworks后,软件自带了培训用的模型,安装在D盘的话模型地址就是D:\Program Files\Altair\12.0\tutorials\hm
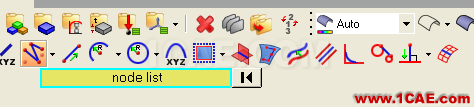
有时我们需要测量模型里点的相对位置,这时候直接按F4快捷键,就会转到以下面板
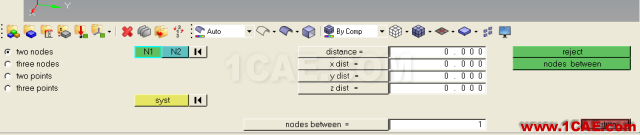
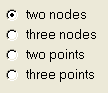
最左边的四个可选项分别对应两个节点、三个节点或两个点、三个点
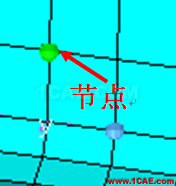
两个节点测量的是网格的节点的相对位置,
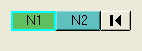
左键点击N1,边框变量,然后左键点击网格的节点会有圆球形的节点出现,代表节点N1,再点一个节点代表节点N2,选错时,点击右键节点会消失
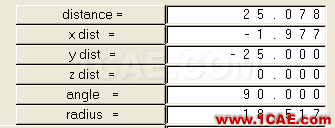
两个节点选中后右侧会显示两点间的距离,以及直角坐标系下的差值,也就是测量结果

此时如果点击右边的”nodes between“,那么就会出现一个新的节点在N1和N2的中间
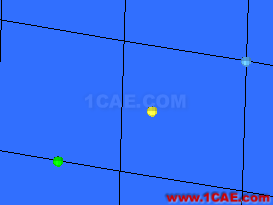
在以下显示的位置输入整数后,再点击”nodes between“就在两个点之间生成输入个数的点

除了两个节点外还可以选择三个节点,此时一般用于测量角度或半径

距离是N1和N2的距离,angle是三个点构成的夹角,半径是三个点构成的圆的半径
右侧多了一个”circle center",这个超有用,点击是会会生成三个点所构成的圆的圆心,这样就可以测量圆心相对其它点的位置

即使点击“return”以后生成的点之间的点或圆心都不会消失
另外除了Node外还有Point可以选择,这是因为node测量的是网格节点的相对位置,而point是用来测量几何上的点的相对位置

这也是Node和point的区别,一个是网格上的节点,一个是几何上的点

point一样可以生成”circle center"和”nodes between“

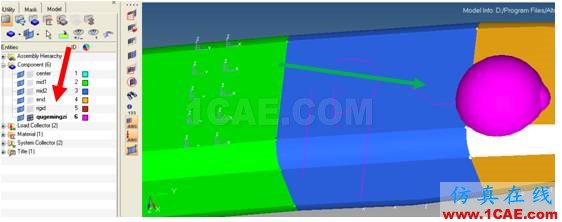
模型管理
打开一个模型,点击左上角的File在软件自带培训模型里打开一个模型
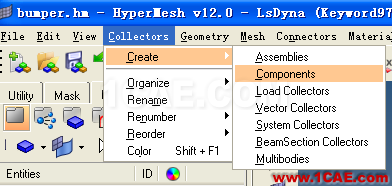
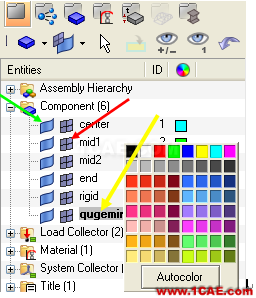
创建一个Component组件,两种方法,一是点击Collector下拉菜单,点击Creat,再点击Components;
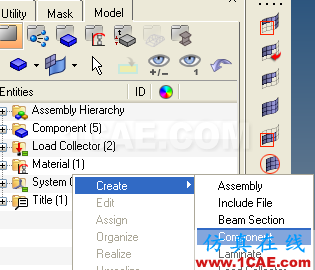
二是点击下图中Mask后排的Model,然后右键点击空白的地方,出现的菜单里选择Creat,再点击Components;
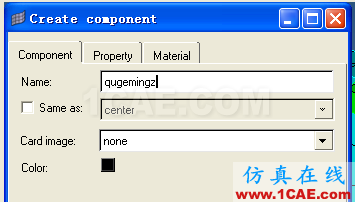
起一个自己看得懂的名字,随意选一种颜色,然后点击创建,其他的先不管它。
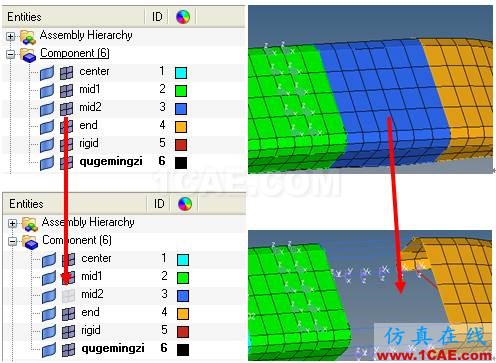
然后左边的结构树里的Component里会出现一个新的组件,黄色箭头这个就是刚刚创建好的组件了,它后面有个编号,编号后有颜色点击右键可以改颜色。
Component里可包含网格和几何,上图中的绿色箭头点击一下,组件里的几何就会被隐藏,红色箭头点击一下,组件网格就会被隐藏。
接下来创建线、点等平面几何,一种方法是在菜单栏里点击Geometry,然后点击Create,再选择Lines,如果要画其他几何的画就选择其它的;
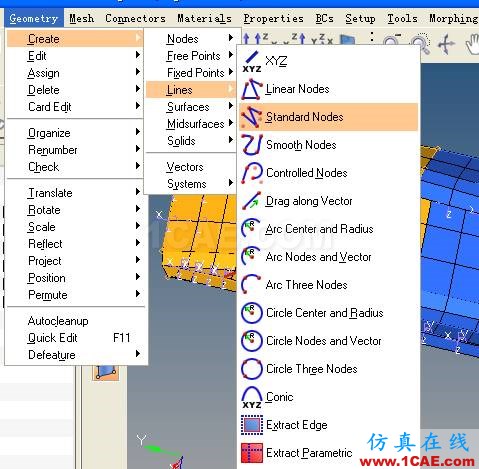
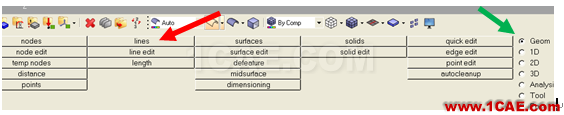
除了上面的方法也可以在最下面的面板中点选绿色尽头指着的Geom,然后点击要画的图的类型,比如线lines。
画线的方法很多种,理解并不是太难,和其他制图软件一样,多种方式来构造线,比如几个点连接、一个点往一个方向拉升、圆心和半径画圆等等,可以随意点击来画线以了解这些画线功能。
同样的道理可以画点、面,还有球等等,用的不会太多,需要的时候记住Hypermesh是可以画很多种类的几何图形的,不一一而足。
在画几何时候,一开始创建的组件的名字的颜色要比其它的组件要更黑更粗一些,这代表所画的图是被放在这一个组件里的。
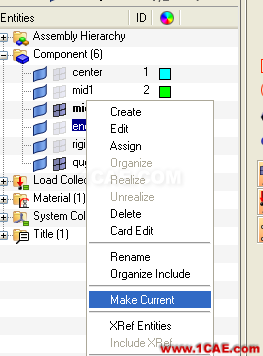
如果想要更换组件,需要用右键点击要选的组件,然后选择make current,这时候被选中的组件就会变亮。
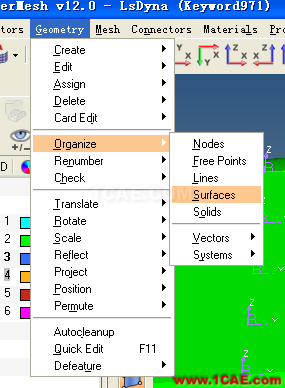
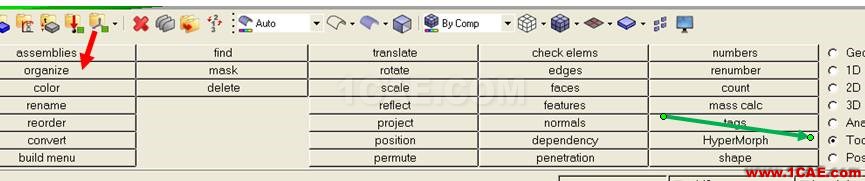
接下来把图或网格移从一个组件移动到另外一个组件里,也是两种方式,一是点击菜单里的Geometry,不过这回不点“创建”而是点击Organize,然后点击那个都没关系。
第二种方式是在面板上点选Tool,然后点击下图中的红色箭头指着的Organize
然后界面是下图这样,最左边要选择collectors
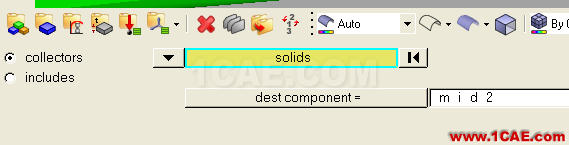
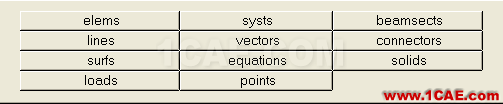
黄底上的字表示要移动的类型,点击上图中的倒三角箭头,,可以选择要移动的元素类型。dest component=意思是指移动的目标组件,根据需要点击选择。
比如移动网格到mid1里面,选择elems,dest哪里点选mid1,然后点击黄底的字,出现一个窗口,这里是表示要用什么手段来选择网格,如窗口、显示、所有或通过ID、选择反转扥等,根据自己的需要选择,用几次就明白了。

选好后点击最右侧的Move,被选中的网格变成了与mid1的网格相同的绿的,表示网格已经被移动到了mid1里。

相关标签搜索:Hypermesh基础入门<1> HyperWorks有限元分析培训 HyperMesh网格划分培训 hyperMesh视频教程 HyperWorks学习教程 HyperWorks培训教程 HyperWorks资料下载 HyperMesh代做 HyperMesh基础知识 Fluent、CFX流体分析 HFSS电磁分析 Ansys培训 Abaqus培训


