UG9.0软件安装教程
2016-11-13 by:CAE仿真在线 来源:互联网
UG9.0 64位软件下载地址:
链接: http://pan.baidu.com/s/1skKByiD
密码: tgq8
安装步骤:
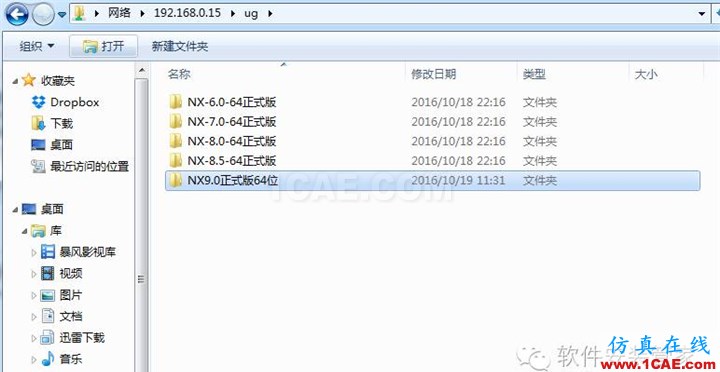
1、下载好软件,解压缩之后就会看到解压缩文件,如图:
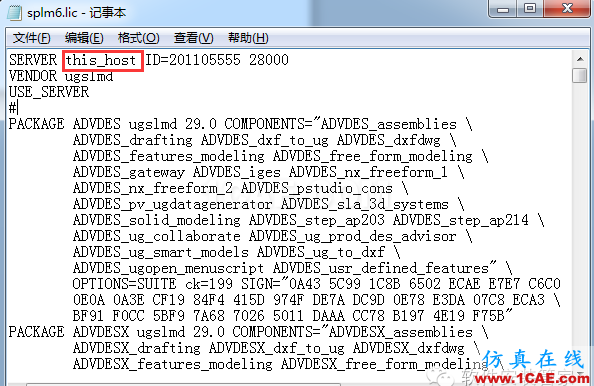
2、 首先我们打开破解许文件,找到UG网许可证破解文件后打开PLMLicenseServer文件,用记事本打开选中的文件如图:

3、打开文件之后要用自己的电脑计算机的名称修改,下面红色方框中的“this_host”,如图:
4、 在 计算机 上单击鼠标右键,然后选择---属性,在弹出的对话框中,选择高级系统设置,在打开的系统属性对话框中选择计算机名选项卡,红色方框内的即为计算机全名,如图:
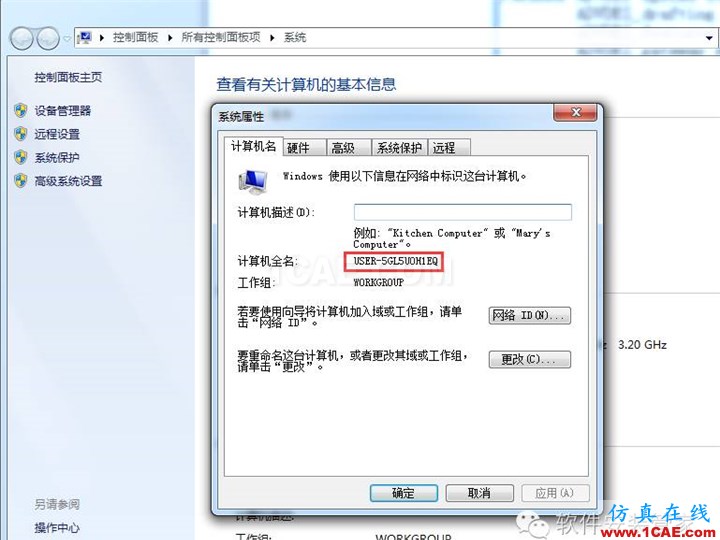
5、然后将计算机名复制、替换到上步骤中的“this_host”中,替换效果后如图:
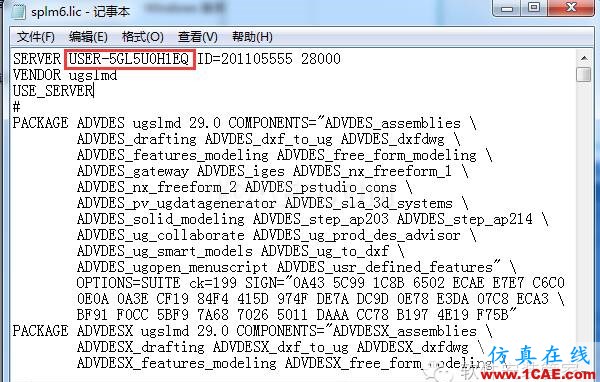
替换完成后选择文件、保存,然后关闭记事本。
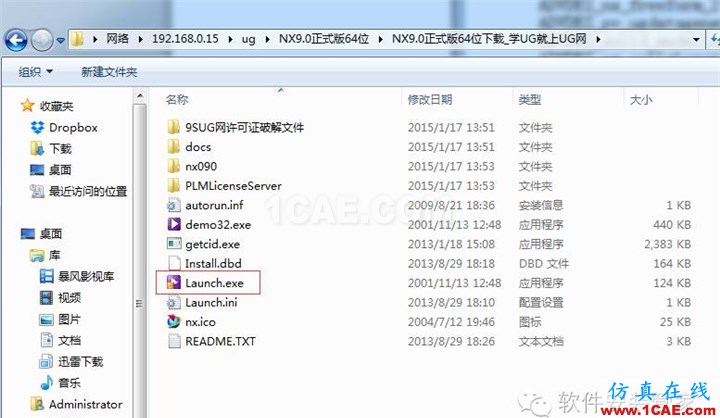
6、开始安装NX9.0正式版64位,双击打开“Launch“:
7、打开ug9.0对话框,如图
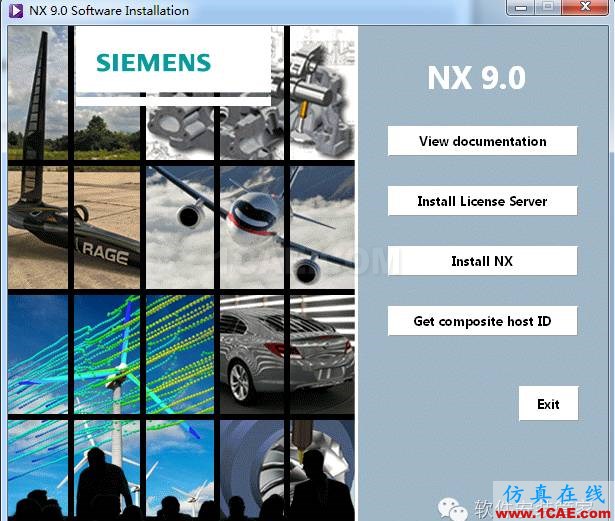
8、首先我们安装主程序。 单击许可证文件即Install NX 选项,出现安装准备对话框,点击确定:如图
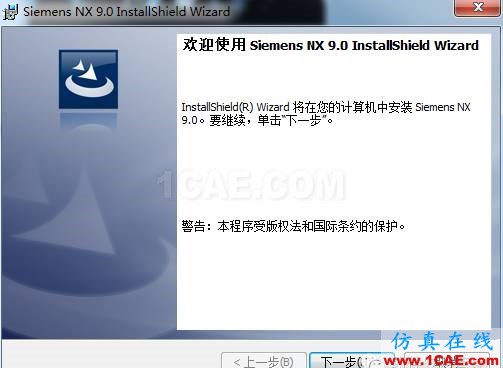
9、点击下一步:
10、
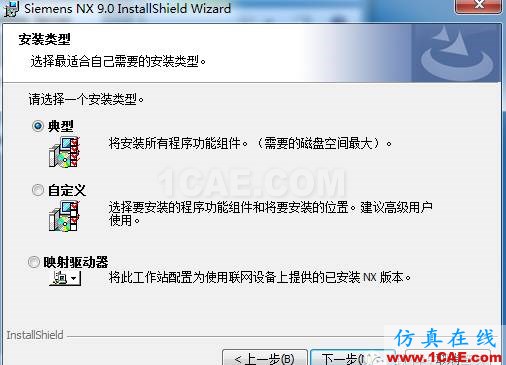
11、在安装类型中选择默认的典型安装,然后点击下一步
12、更改安装目录,选择更改命令,如图
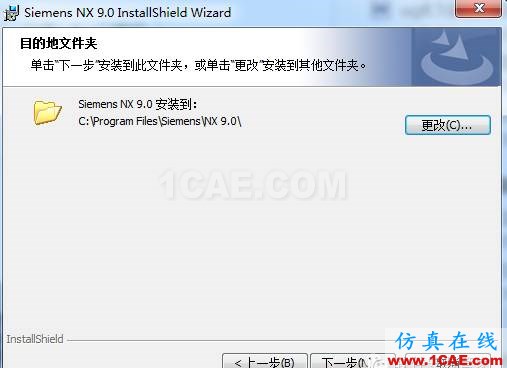
13、 选择要安装的目录,然后点击下一步,如图
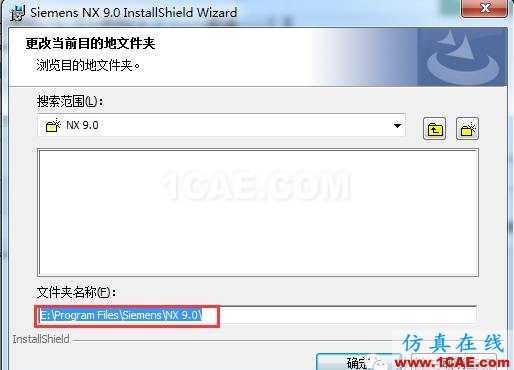

14、注意:一定要确认红色方框内的计算机名称与您电脑的计算机名称一致

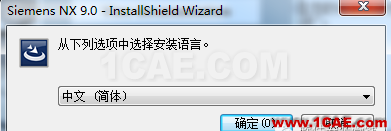
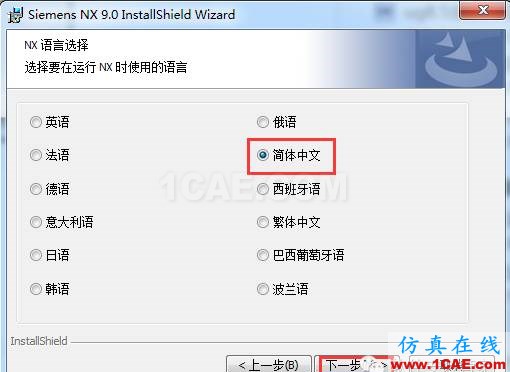
15、 选择安装语言为简体中文,选择下一步
16、再次确定安装信息,如果准确无误,选择安装,如图
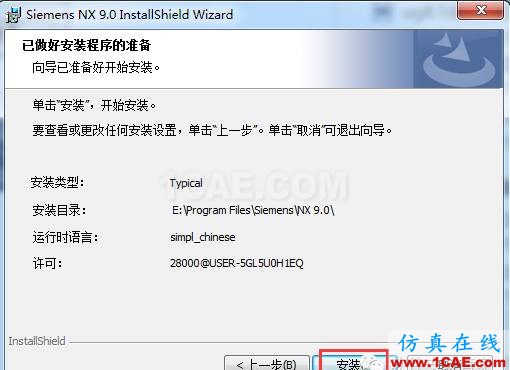
点击Exit,退出ug安装程序
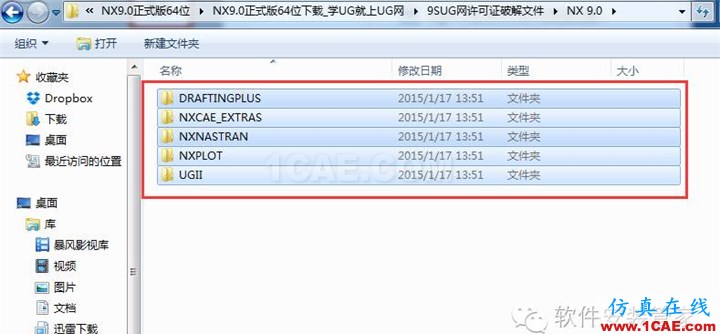
17、打开NX9.0正式版64位\NX9.0正式版64位下载_学UG就上UG网\9SUG网许可证破解文件\NX 9.0,找到五个文件,并点击复制如图:
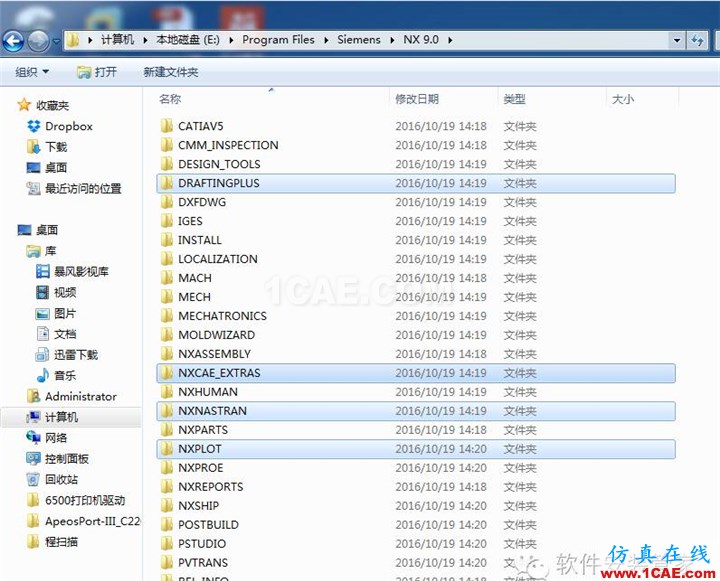
18、将该文件粘贴到,UG的安装目录E:\Program Files\Siemens\NX 9.0下,替换这五个文件,如图:
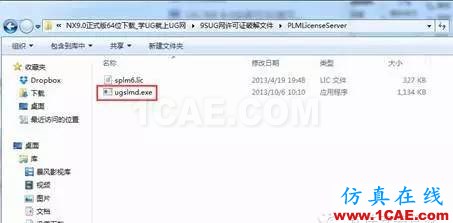
19、在破解文件夹_SolidSQUAD_/PLMLicenseServer中找到复制到许可证的文件 ugslmd.exe 文件,如图
20、将文件粘贴到安装目录 PLMLicenseServer 文件夹下面,替换这个文件

相关标签搜索:UG9.0软件安装教程 ug nx培训课程 UG培训 ug模具培训 ug视频教程 ug设计教程 ug软件下载 UG-autoform-dynaform仿真一体化 ug在模具建筑室内设计工业设计的应用 UG代做 UG基础知识 Fluent、CFX流体分析 HFSS电磁分析


